 Guide On Map
Old Fremantle: Center, Port, and Two Prisons
From Walyalup Koort through the West End and the waterfront to Fremantle Prison
Guide On Map on your phone
Open the walk like a regular app
It takes about 10 seconds to install. No app store needed.
The whole path
Route map
About the walk
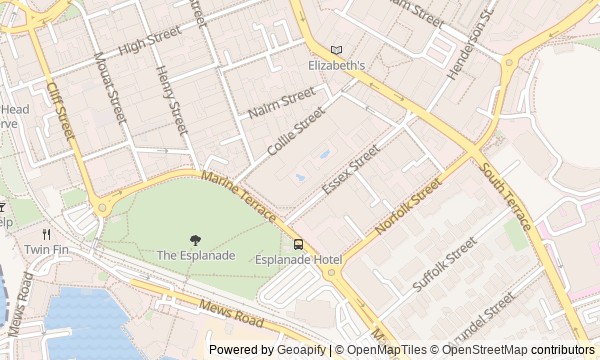
You will begin at Walyalup Koort, follow High Street through the West End, and climb Arthur Head. Then the route drops through a tunnel to Bathers Beach, continues along the old port waterfront, through museum galleries and Fishing Boat Harbour. From the water, you will return to town: first to the market, then to the large prison on the hill.
The colonial center was built on Noongar Country, and its connection to that land is more complicated than the facades suggest. A family shop's date remains on a wall. Beneath a prison, there is a passage cut for the whaling trade. In a museum gallery, an original ship's side stands beside a replica stone portal—you will discover inside why the originals were separated.
The story follows documents, visible traces, and human decisions, without striking a heroic pose. By the end, you will be able to explain how deals, forced labor, and maritime trade reshaped this particular center—from the line of High Street to the limestone prison wall.
Why this order
Walyalup Koort introduces the dispute over land and the planning of the town center, so High Street comes next: it crosses the former square and leads through the trading district that grew after the same remaking of the town. The merchant street runs into Arthur Head and Round House, where the trading town first reveals its system of imprisonment. The next layer lies directly beneath it: Whalers Tunnel connects the prison and prisoners' labor with a private port calculation. Its seaward exit brings you to Manjaree, where colonial structures occupied an earlier Noongar gathering place. From there, the route follows the waterfront: the museum shows the fate of objects raised from the sea, while Fishing Boat Harbour shows the people who continued to make their living from the trade. From the working harbor, the route turns toward the market—from catch and unloading to urban sale. The final climb to Fremantle Prison completes the chain: port, warehouses, and market stand beside the Convict Establishment whose prisoners built the colony.
First-time visitors to old Fremantle Lovers of urban history, maritime archaeology, and port environments Those ready to hear colonial stories without simplification
Those looking for a short walk without museum stops Those wanting a route focused only on cafes and the modern waterfront Those who prefer to avoid stories of imprisonment and execution
Before you go
Check the availability of Round House, Whalers Tunnel, the museum, and Fremantle Markets for your chosen day: the route's open spaces do not guarantee entry into the buildings. To visit the cells at Fremantle Prison, choose a separate tour in advance and set aside fixed time for it. Bring water, sun protection, and shoes comfortable for stone, stairs, and extended walking. Download the route before you leave: at the headland, it is useful to have a map handy if a passage is temporarily closed.
When to go
Allow about 3 hours for nine stories and the walks between them, without detailed visits. Add another 45–60 minutes for the museum and about 75 minutes for a separate Fremantle Prison tour. With all visits included, the walk takes about 4–5.5 hours.
Backup plan
If a historic building is closed, do not try to go beyond barriers: at Round House, study the exterior geometry, and at Whalers Tunnel, look at the accessible portal and the cut through the hill. A closed market can still be read through the facade and volume of the former trading hall, then continue to the prison. If there is not enough time for the museum, limit the stop to the building and its waterfront context rather than retelling the story of Batavia from memory. Without a tour of the final prison, end the route at the entrance complex and the outer limestone walls.
Route conditions
Surface. Paved — 2.8 km; unpaved — 38 m (data covers 69% of the route)
Access. Wheelchair — limited; stroller — limited
Facilities. Toilets — 12; drinking water — 5
Elevation. Ascent — 28 m; descent — 25 m
OpenStreetMap extract of July 3, 2026: database data, not a check on the ground. Data © OpenStreetMap contributors, ODbL licence
Walk plan
Open in maps ↗- 1
Walyalup Koort
This stop poses the route’s central question: who changed the town center, and through what deals? - 2
High Street and the West End
The facade shows how a family shop grew alongside the port trade. - 3
Round House
An early colonial prison becomes the setting for the story of a convicted teenager and a confession before execution. - 4
Whalers Tunnel
The passage will link prisoners' labor to the whalers' private calculation. - 5
Manjaree and Bathers Beach
Here you will hear about Noongar gatherings where the exchange of goods was accompanied by the formation of family ties. - 6
WA Shipwrecks Museum
You will learn why lifting ancient wood from the seabed was only the beginning of saving it. - 7
Fishing Boat Harbour
The memorial helps reveal the working families' port behind the recreational harbor. - 8
Fremantle Markets
The history of an empty building explains why the market did not give way to a road intersection. - 9
Fremantle Prison
The finale will show how the regime, labor, and the material of the walls came together in a single escape.
Route features
Everything you need stays in the browser
Progress, saves and your trip plan are stored on this device.
Add Guide On Map to your home screen so the walk opens outside the browser.
How we handle sources, maps and corrections: our editorial standards