 Guide On Map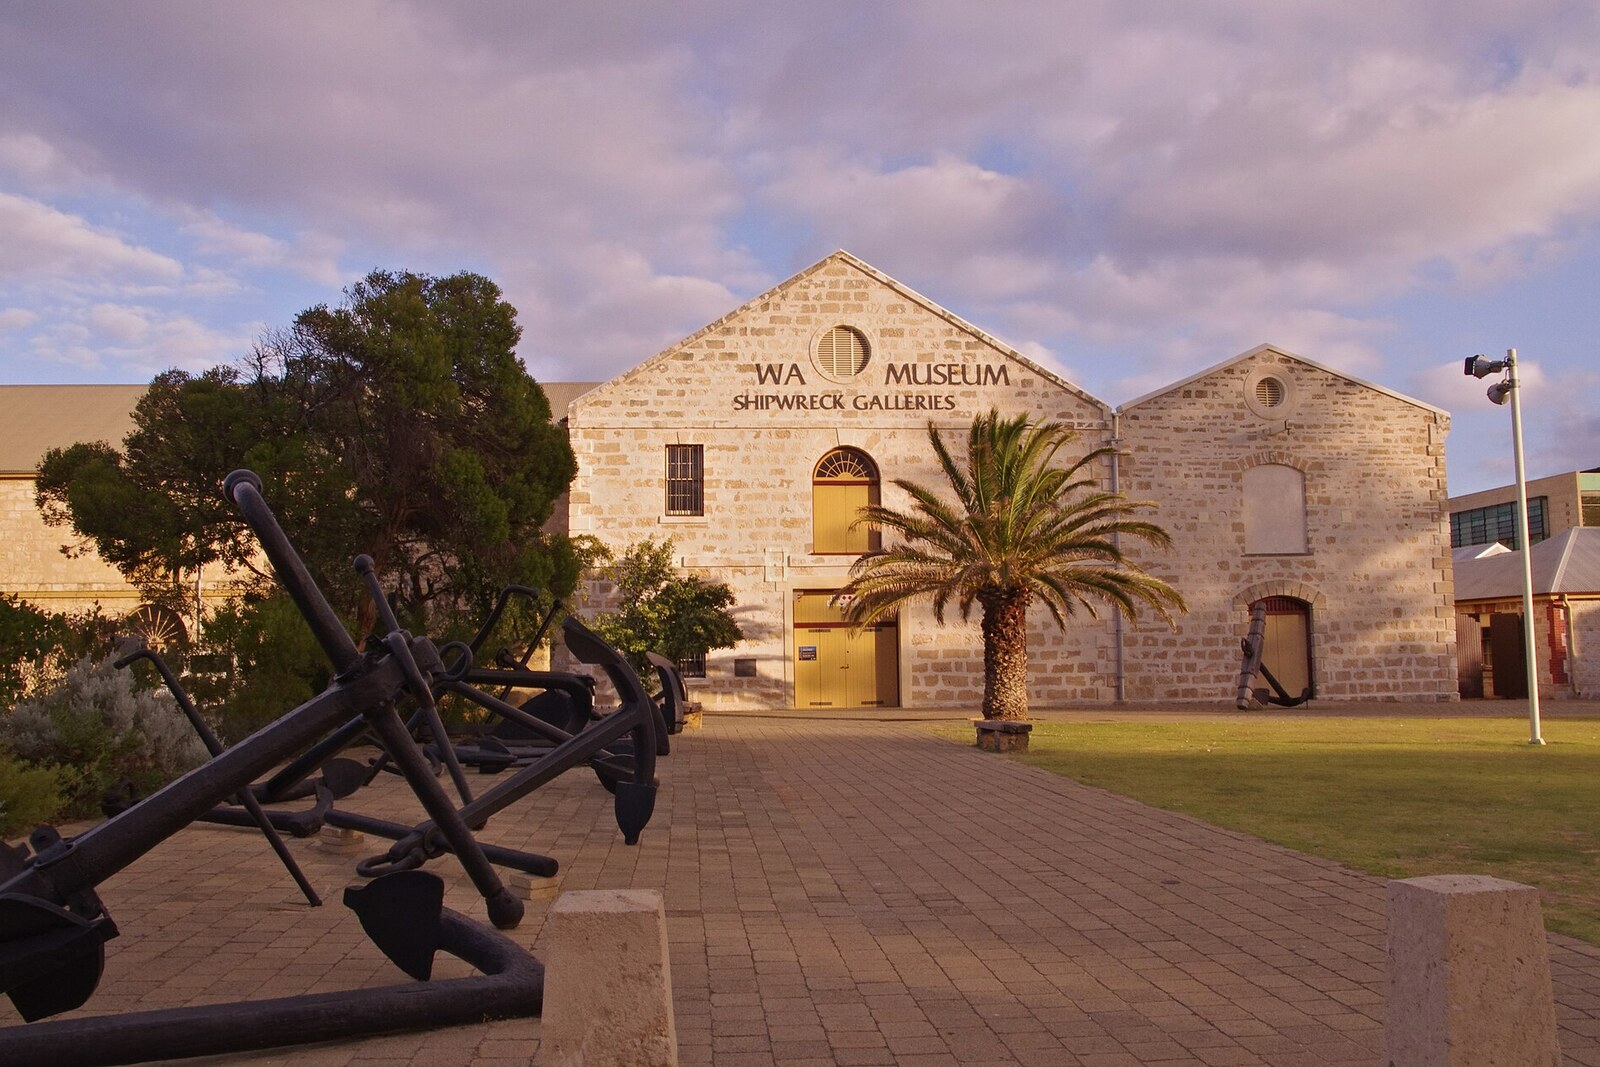
Look around first
What to notice
- Broad-arrow stamps
- The stern section of the Batavia
- Metal frame
- Copy of the stone portal
The story of the place
Marine archaeologists display here a fragment of the port side near the stern of the Batavia, assembled on a metal frame that can be dismantled. No new holes were made in the old oak: the parts are held in place through the original locations of the ship's bolts, and any timber can be removed on its own. A copy of the stone portal stands nearby; its real blocks were sent to Geraldton, closer to the reef where they were found. The laboratory beside the gallery was one reason to leave the timber in Fremantle rather than move it to the wreck site.
The stone buildings on Cliff Street were built in the eighteen fifties as the Commissariat Buildings—the young colony's government storehouse. Convicts erected the walls, while carpenters and blacksmiths marked government-owned beams, hinges, and window grilles with a broad-arrow stamp. These marks have survived. In nineteen seventy-nine, restorers adapted the former storehouse for the collection of marine archaeologists. This is how the present WA Shipwrecks Museum opened here.
The greatest challenge for its staff was the remains of the Batavia, a trading ship of the Dutch East India Company that was wrecked near the Houtman Abrolhos Islands in sixteen twenty-nine. Beneath stones, sand, and a layer of marine deposits, about a tenth of the hull survived. Everything that lay exposed had long since been destroyed by water and marine organisms.
From nineteen seventy-two to nineteen seventy-six, museum archaeologists raised the surviving parts from the seabed. Here, a danger arose that had not existed underwater. Wood cells saturated with seawater could collapse as they dried, and the three-hundred-year-old timbers would lose their shape once they had been salvaged. On the island, staff placed them in plastic-lined pits filled with seawater. Before sending them to Fremantle, they wrapped each part in burlap soaked in water and an antifungal solution, then sealed it in plastic.
In the museum laboratory, the timbers were kept in fresh water for about two years, gradually drawing out the salts. Conservators chose polyethylene glycol—a water-soluble wax capable of reinforcing decayed wood cells. The parts were immersed in heated baths, with the solution's concentration increased little by little. This took another two or three years. Then, over six months to a year, the humidity in the drying chamber was carefully brought closer to the conditions of the future gallery.
It remained to understand how the scattered timbers had connected in the ship. Richard Steffy, a specialist in reconstructing ancient vessels, used one of the early computer calculations of this kind: a program helped determine the rotation and position of every part in a three-dimensional structure. From nineteen eighty-one to nineteen eighty-seven, staff assembled the port-side stern section on a specially made metal frame. They tried not to drill new holes in the old oak—the fastenings were inserted into the original holes left by the ship's bolts. Any timber could be removed separately, without dismantling the rest of the hull.
This foresight was needed even before the work was complete. In the mid-eighties, at high humidity, iron compounds within the wood began to form acid. The surface of some timbers became brittle. Conservators treated the damaged parts with gaseous ammonia, continued looking for a compatible consolidant, and later replaced the equipment that maintained temperature and humidity in the gallery.
In nineteen ninety-two, a parliamentary commission considered whether the finds from the Batavia should be moved to Geraldton—the nearest major city to the wreck site. The commission kept the hull in Fremantle precisely because of its proximity to the laboratory and to the people who continued to monitor it. However, the original stone blocks of the portal that the ship had been carrying for Batavia City were later moved to Geraldton. A copy was installed in the Fremantle gallery.
So inside the former government storehouse stand the authentic stern of the Batavia on a demountable frame and a copy of the stone portal. The original of the first object remained beside the conservators; the original of the other now stands closer to the reef from which it was raised.
Useful on site
Daily 09:30–17:00; general admission is free, recommended donation — 5 Australian dollars.
Checked: date not specified. Check the official source before visiting.Visiting the museum requires separate time. If you go in, find the Batavia gallery first, then decide how many of the other displays you will have time to see.