 Guide On Map
Amsterdam Canal Ring: Power, Money, and a City on Water
From Dam through Herengracht and Jordaan to Brouwersgracht
Guide On Map on your phone
Open the walk like a regular app
It takes about 10 seconds to install. No app store needed.
The whole path
Route map
About the walk
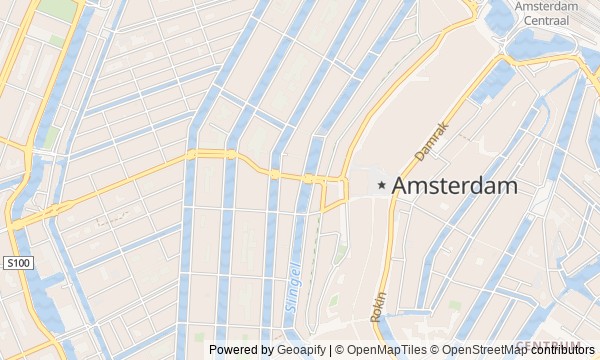
You will begin at Dam, then head into Begijnhof and on to the grand houses of Herengracht. After the southern bend, you will return north along the water, cross Singel, and reach Westerkerk by way of Keizersgracht. Then you will follow Prinsengracht into Jordaan and finish at Brouwersgracht.
Behind residential facades, you will find a church. In the paving lies the outline of a vanished prison. Above a copper roof, the letters of a company that no longer exists remain. Twice, furniture will end up in the canal; in one case, a lamppost will become a battering ram. In a market square, it will all begin with a cart and a short call.
The story will be calm and precise. It will be led by a doorway, an insurance policy, a church record, and a board bearing the exact time of a meeting.
By the end, you will understand why Amsterdam Canal Ring was at once an address of wealth, a private refuge, and a place of open defiance.
Why this order
At Dam, the city authorities will not be able to keep order at once after the announced liberation. Next, Begijnhof will show another way of living through a council decision: not in an open square, but behind private doors. From the hidden courtyard, the route will emerge into the wealthiest stretch of Herengracht, where a dispute over a city tax reaches the mayor's house. Returning north along the same canal makes it possible to trace the Amsterdam Canal Ring of mansions to the old boundary at Singel—where a crowd will already be freeing prisoners. From Torensluis, a short walk along Leliegracht leads to Astoria: after state control, the route turns to a private promise measured in decades. The same street brings you to Westerkerk, where the story of money ends with a rented grave. Prinsengracht links personal ruin to collective protest at Noordermarkt. The final stretch along Brouwersgracht leads to Herenmarkt and closes the route with a second tax riot—again with confiscated furniture by the water.
Those who want to understand Amsterdam Canal Ring through the stories of specific addresses Those interested in urban conflict, faith, and labor history Those who enjoy spotting historical traces in paving, facades, and inscriptions
Those looking only for an architectural overview of grand houses Those who find it difficult to hear about war, repression, and street violence Those who do not enjoy long return stretches along canals
Before you go
All the main observations are made from outside, so no tickets or advance reservations are needed for the route. Wear shoes suitable for stone paving and bridges, and do not confuse the sidewalk with the bicycle lane: by the water, pedestrians, bicycles, and service vehicles often share the space. At Begijnhof, remember that this is a residential courtyard, not a museum setting: speak quietly, do not look into windows, and do not block passageways. Along the canals, it is worth changing your viewpoint several times—a wide facade, a bridge arch, or old brickwork may be clearly visible only from the opposite bank. Treat church interiors and other buildings as separate visits if you decide to add them to your walk.
When to go
It is best to walk in daylight, when masonry, facade details, and traces of vanished structures are easier to see. Set aside several unhurried hours for the full route; after rain, bridges and paving require more attention.
Backup plan
The route divides easily into 2 independent parts. On your first outing, walk from Dam to Golden Bend: this is the story of the early city, its boundaries, and the emergence of a prestigious canal address. On the second, begin at Keizersgracht and continue to Brouwersgracht—here the main themes are expansion, Jordaan, markets, warehouses, and the harbor economy. If the weather worsens while you are already on the route, do not try to linger on every bridge: listen to the story in a nearby sheltered spot, then approach the indicated details briefly. If you are tired, Westermarkt is a natural place to finish; the remaining 2 stops form a connected final section for another day.
Route conditions
Surface. Paved — 4.2 km
Facilities. Toilets — 11; drinking water — 6
Elevation. Ascent — 30 m; descent — 40 m
OpenStreetMap extract of August 12, 2026: database data, not a check on the ground. Data © OpenStreetMap contributors, ODbL licence
Walk plan
Open in maps ↗- 1
Dam
Here, the dangerous pause between the announced liberation and actual control of the city will become clear. - 2
Begijnhof
This stop will show how private property helped a Catholic community stay together. - 3
Golden Bend on Herengracht
The grand facade provides the first address in the conflict between the city council, livelihoods, and taxes. - 4
Torensluis and Singel
The trace of a vanished tower links the old city boundary to the freeing of prisoners. - 5
Keizersgracht and Astoria
Here we will see how a company tried to outlive its founder and what remained after it disappeared. - 6
Westermarkt and Westerkerk
A church record will bring the famous artist back from museum renown to the ordinary order of city burials. - 7
Noordermarkt
This market square shows how two municipal workers brought an underground call out into the streets. - 8
Brouwersgracht at Herenmarkt
The final stop will make it possible to compare the second tax riot with the conflict outside the house on Herengracht.
Route features
Everything you need stays in the browser
Progress, saves and your trip plan are stored on this device.
Add Guide On Map to your home screen so the walk opens outside the browser.
How we handle sources, maps and corrections: our editorial standards